
 Save
Save
The first chill of the season had barely hit when Dad wandered in from the orchard, arms full of apples that were still cold from the winds. Mom would always hollow them out and try every kind of sweet she could mix up, but nobody forgot the autumn she combined cheesecake and juicy apples. For a second, everyone just stopped and stared at each other, quiet. Then we all dove in. Those bites tasted just like grandma’s spicy pie and those famous creamy cheesecakes we’d fight over at birthdays. That’s the year this treat became part of our fall traditions.
I tried this cheesecake spin after battling one too many impossible crusts, and flour covered pretty much every surface in sight. Turning the apple into its own shell? Total win. Way less mess, tons more flavor, and honestly, the best filling you’ll ever eat with a spoon.
Irresistible Ingredients
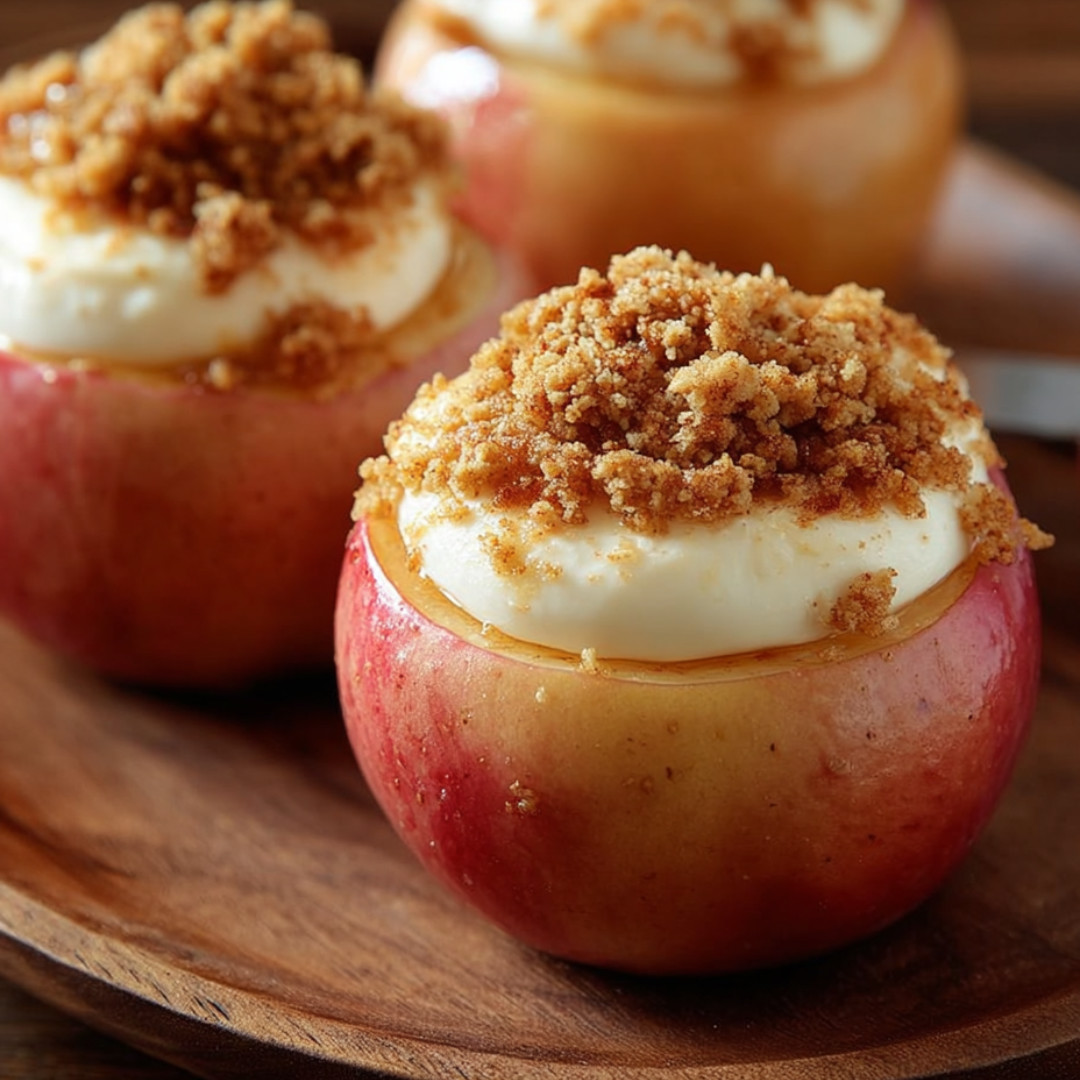
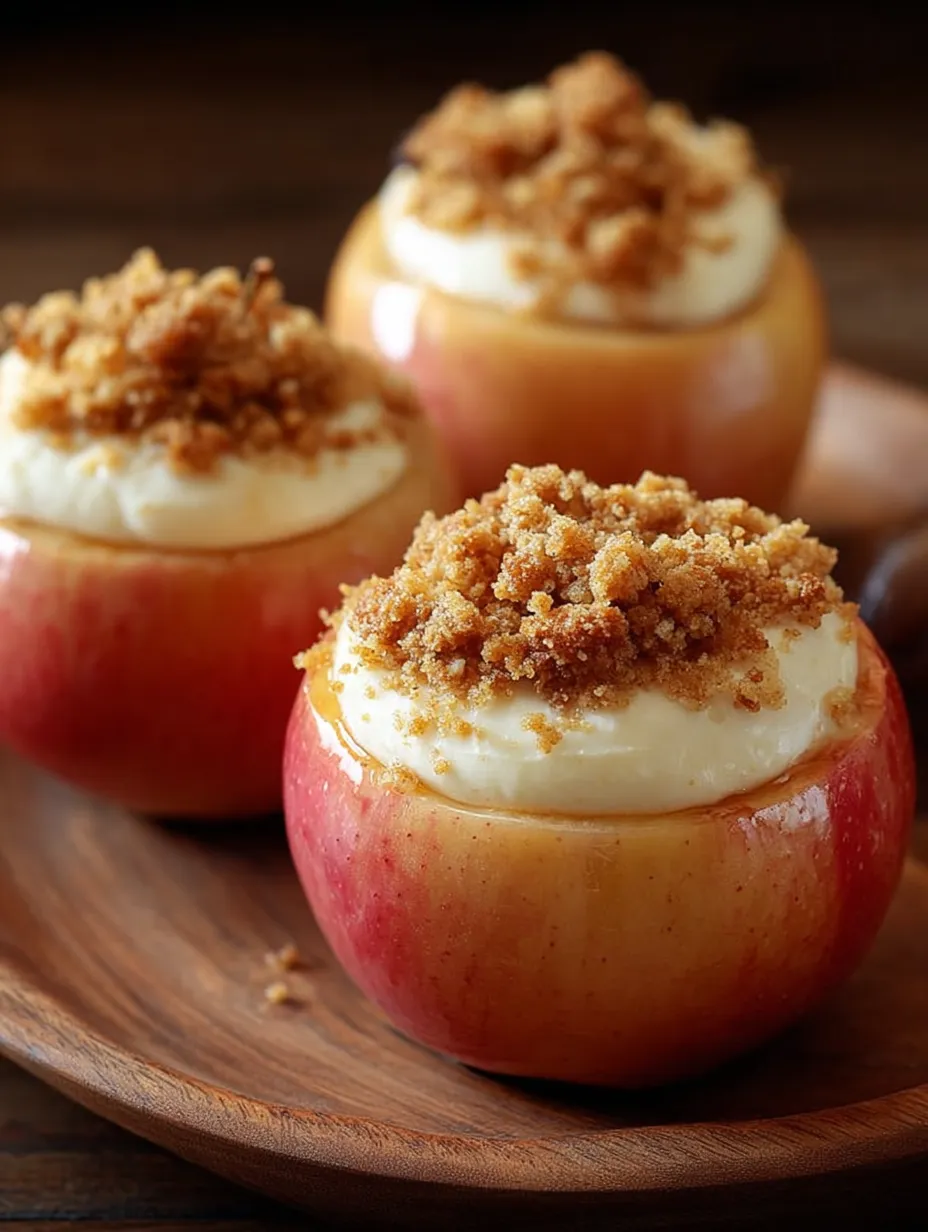
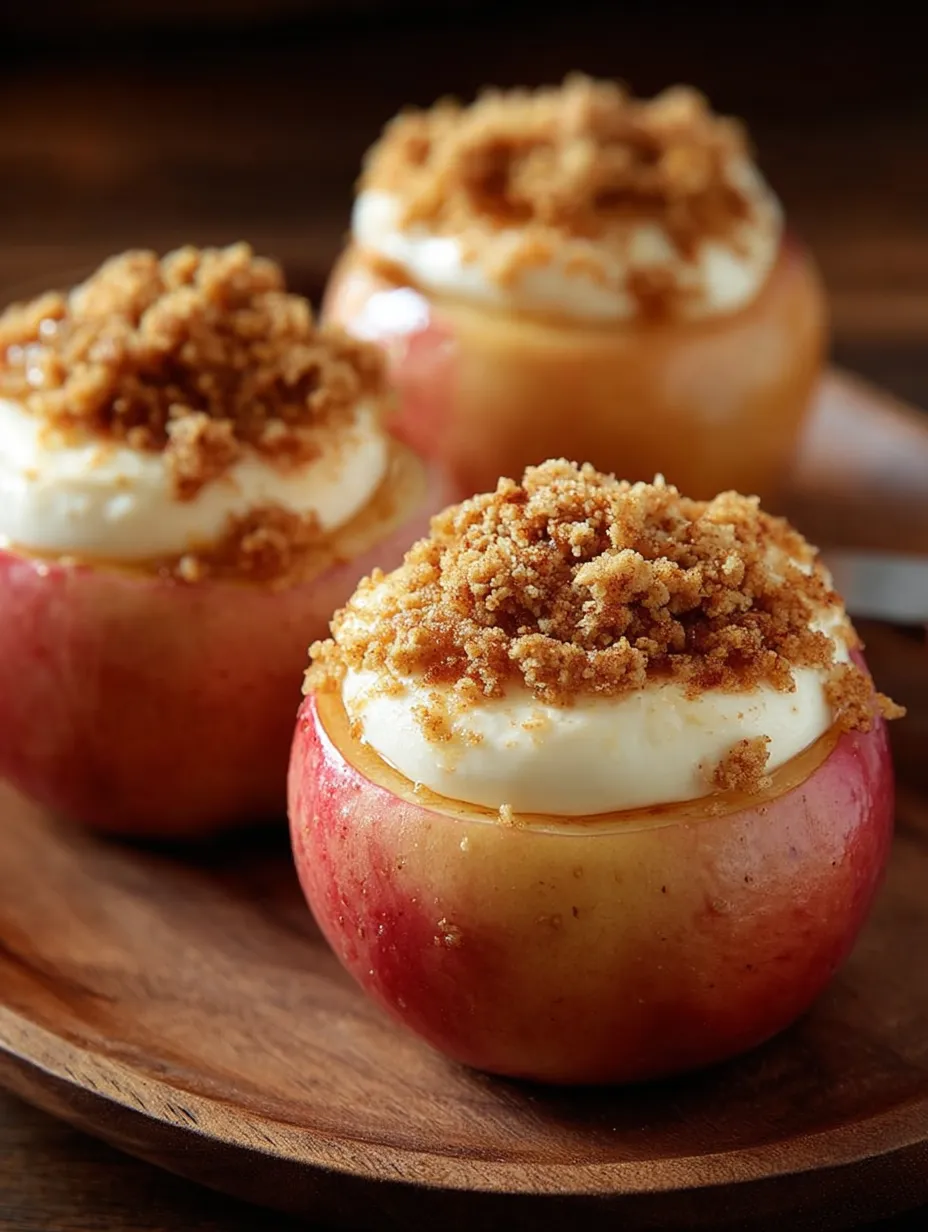
- Apples: You need firm, big apples with no bumps or bruises—try Granny Smith for a tart hit or Honeycrisp for that sweet snap. Firm skin keeps them together in the heat.
- Cream Cheese: Let it sit out so it gets soft—smoothest filling ever this way. Block cream cheese gives body, skip anything pre-whipped.
- Sugar: Plain white sugar is what you want, but taste as you mix so you get it just right for you.
- Vanilla Extract: That deep vanilla makes it taste “cheesecakey”—real extract adds warmth and depth.
- Cinnamon: Can’t skip this! Use in both the filling and sprinkled on top. Sniff for fresh, sweet spicy scent.
- Lemon Juice: Fresh-squeezed wakes up both the apples and the filling. Use a real lemon for the zing.
- Graham Cracker Crumbs: Crunchy topping, classic flavor. Crush them fine for best results; gluten-free versions work great here, too.
- Butter: Melted and stirred into crumbs—think moist sand. Unsalted is best so you can control the flavor, and it gives the topping a buttery appeal.
Foolproof How-To
- Oven Warm-Up:
- Crank the oven to 375°F (190°C) and let it heat while you get everything else done. If you start with a hot oven, you’ll get perfect baked apples and no soggy tops.
- Scoop the Centers:
- Take your melon baller or a knife and gently dig out the core, but keep a thick bottom so the filling doesn’t leak out. This also makes the apple stand tall while baking.
- Stir Up the Filling:
- Mix softened cream cheese, sugar, vanilla, and cinnamon together until totally velvet-smooth. Don’t rush this—room temp cream cheese keeps it creamy.
- Stuff the Apples:
- Fill each apple generously, pressing the filling way down so there aren’t empty pockets hiding inside.
- Build the Topping:
- Stir melted butter into your graham cracker crumbs with a little cinnamon. When it clumps in your hand, it’s ready to sprinkle on top of the apples.
- Arrange and Brighten:
- Snuggle all your apples into the baking dish. Squeeze some lemon over them to keep the colors popping and perk up the flavors.
- Time to Bake:
- Pop the whole thing in the oven. Apples should soften but not fall apart, and you want golden, slightly puffed tops. That’s your sign they’re done.
- Let Them Rest and Dig In:
- Wait a few minutes out of the oven so the filling stays put. Eat straight from the pan or finish with ice cream or warm caramel sauce.
Why You’ll Love This
- Swap out graham crumbs for gluten-free to make it friendly for everyone
- Forget complicated pans or fussy crusts—just a basic baking dish needed
- Cream cheese delivers protein, apples bring fiber and crunch
- Make ahead and heat up later for easy serving
Once, I got lazy and picked up some soft apples from the store—ended up with apples that melted into the pan and lost their shape. Lesson learned: pick firm fruit always. My other pro move? Add a scoop of oat crumble to your graham mix for the perfect crunchy bite, especially if your crew loves old-fashioned apple crisp.
Do-It-Ahead Tips
- You can prep and fill the apples the night before. Wrap up tightly in the fridge and let them warm up on the counter when you’re ready to bake.
- Bake them off early, store chilled, and reheat in the oven. If you let them sit overnight, the taste just gets better.
- They’ll be fine for three days in the fridge. Skip freezing though—the creamy center just gets watery.
Tasty Changes
- Throw in some chopped nuts with your graham topping for extra crunch
- Warm up the filling with a touch of ginger, cardamom, or even a hint of clove
- Try honey or maple instead of sugar, and grab your go-to dairy-free cream cheese to make it totally vegan
Switch It Up by Season
- Use halved peaches during late summer—just cut the oven time
- For festive feel, stir in some orange zest or top with dried cranberries
Must-Have Tools
- A good melon baller or sharp knife makes hollowing apples easy and keeps the bottoms safe
- Use a small offset spatula or even just a regular spoon to pile in the filling
- Choose a baking dish where the apples can stand touching each other—they’ll hold up better as they bake
Pro Tips for Success
1. Cream cheese should always be soft, otherwise you’ll get lumps and weird texture.
2. Don’t let them overbake—poke them with a fork, and stop when the apples are tender but still holding up.
3. Give them a few minutes after baking so the middle gets that dream creamy bite instead of oozing everywhere.
Frequently Asked Cooking Questions
- → What apple should I use?
Granny Smith and Honeycrisp won’t get mushy, and they keep a nice mix of sweet and tangy taste.
- → Can I get these ready beforehand?
Definitely. Put the apples together up to a day early and stick them in the fridge. Pop them in the oven when you want to eat.
- → Any tips for gluten-free?
Just grab gluten-free graham crackers for the topping instead of the usual kind.
- → Ran out of graham crackers—help!
No worries, swap in crushed vanilla cookies, digestives, or a buttery mix of almond flour for the crumb stuff on top.
- → What’s the best way to store extras?
Seal leftovers in a fridge-safe box. Warm them up in the microwave or oven before digging in.
- → Can I toss in nuts or more spices?
Absolutely! Toasted pecans are great, and a shake of nutmeg or clove can really kick things up.