
 Save
Save
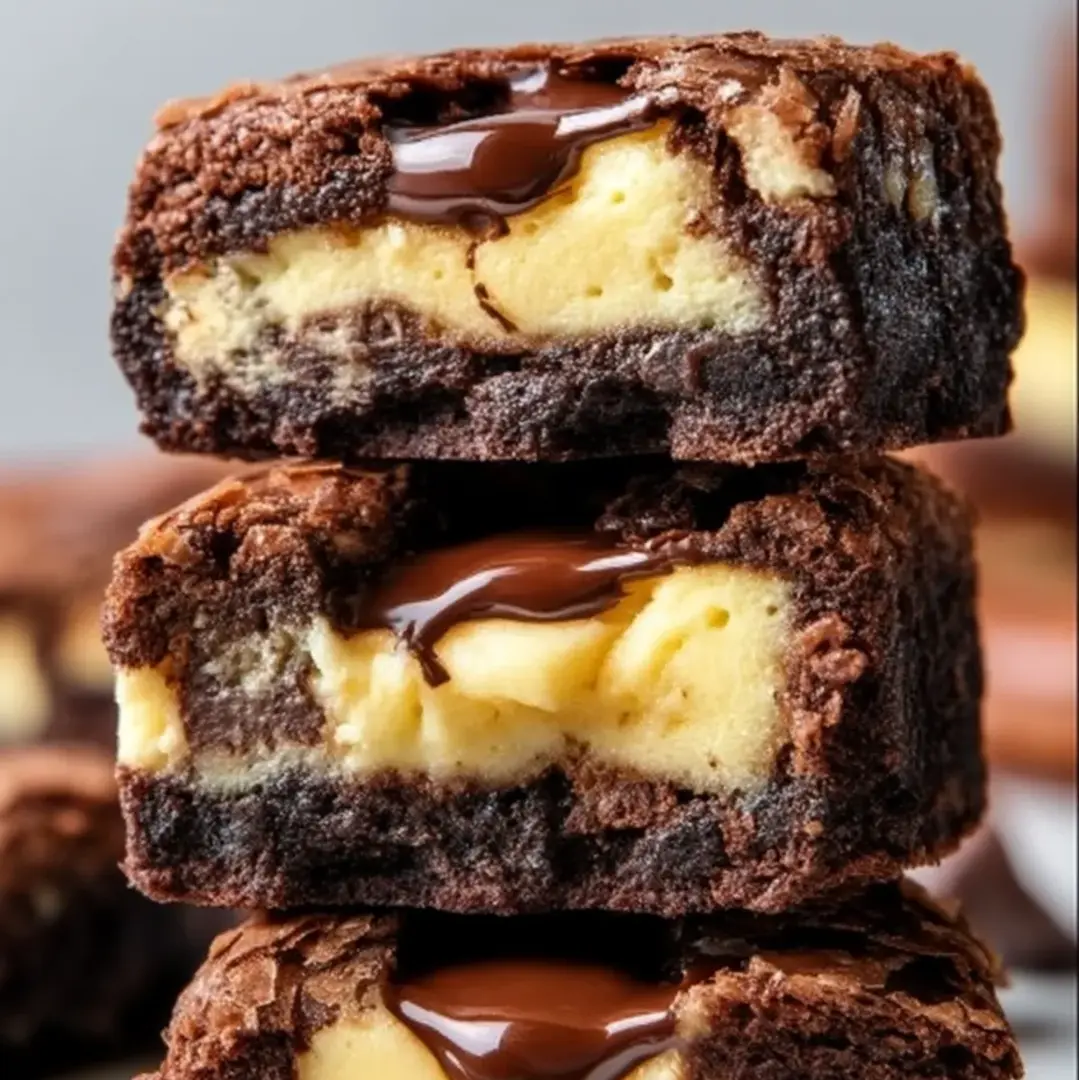
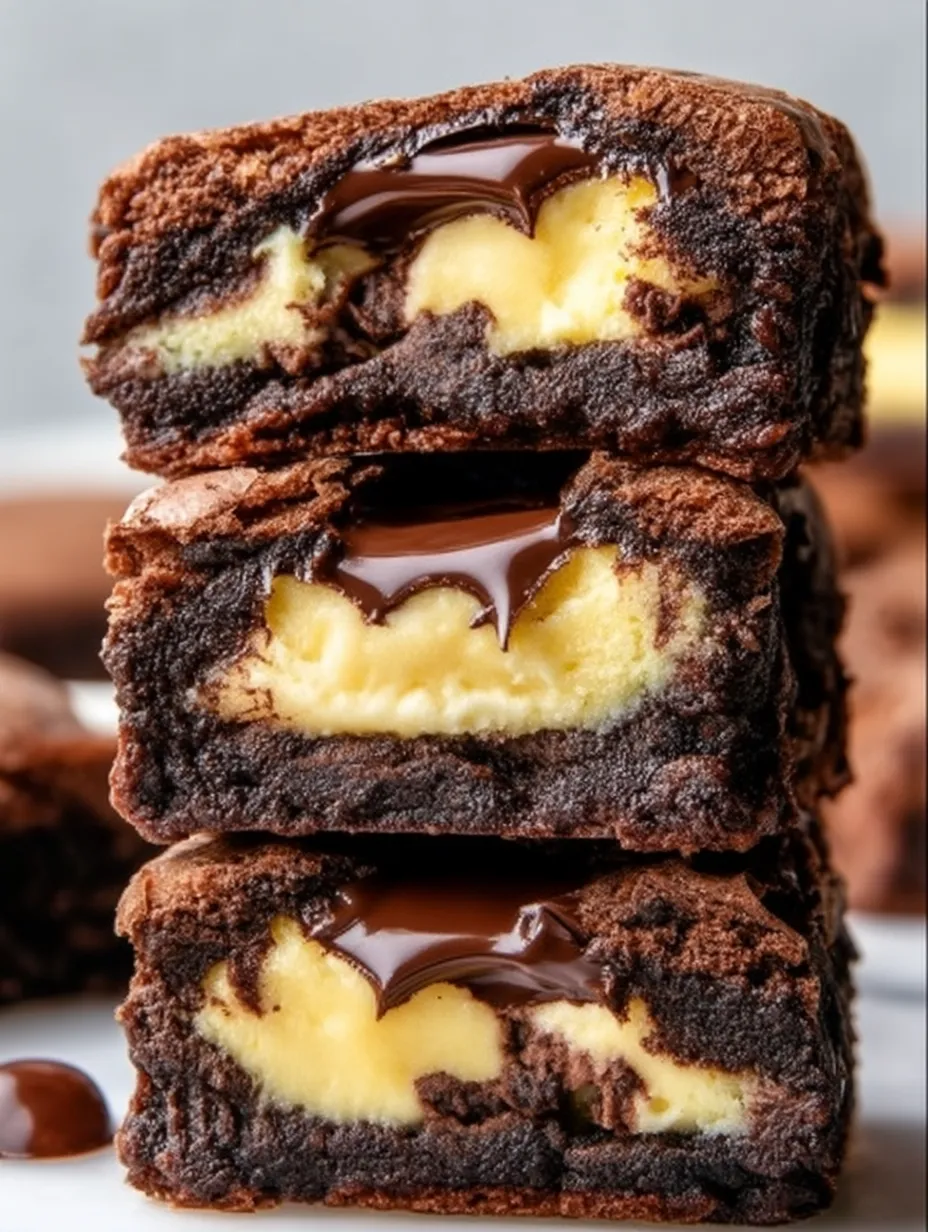
These indulgent brownie-cheesecake bites blend fudgy chocolate goodness with swirls of tangy cream cheese to make a mouthwatering treat. The marbled pattern isn't just beautiful to look at—it delivers an amazing mix of intense chocolate and smooth creaminess in every single bite.
I came up with these tasty bites for my sister's wedding shower and they vanished in seconds. These days, my family won't let me show up to gatherings without them, particularly during Christmas when everyone's looking for something sweet and special.
Ingredients
- All purpose flour: gives these bites their just-right texture
- Unsweetened cocoa powder: brings rich chocolate flavor without extra sugar
- Baking powder: adds the perfect tiny bit of rise without making them too fluffy
- Salt: brings out every flavor and cuts through sweetness
- Unsalted butter: makes everything moist and decadent
- Granulated sugar: gives the chocolate base its ideal sweetness
- Eggs: hold everything together while adding a rich texture
- Vanilla extract: makes the chocolate taste even better
- Semisweet chocolate chips: create yummy pockets of melted chocolate
- Cream cheese: forms the creamy cheesecake swirls; go full fat for best taste
- Powdered sugar: makes the cheesecake part smooth and sweet
- Lemon zest: skip if you want, but it adds a nice little zing to the cheesecake
Step-by-Step Instructions
- Get Ready:
- Heat your oven to 350°F and put parchment on your baking sheet with extra hanging over the sides so you can lift everything out later. Don't skip the parchment or you'll have a sticky mess that ruins your beautiful treats.
- Mix The Chocolate Part:
- Stir all dry stuff together and break up any cocoa clumps. In another bowl, beat butter and sugar until it's fluffy and light, about 2 minutes. This step really matters for getting that perfect brownie feel. Put in eggs one by one, mixing well each time. Add vanilla last before combining with your dry mix.
- Make The Cheesecake Mix:
- Make sure your cream cheese isn't cold or you'll get lumps. Beat it till it's super smooth, then add powdered sugar. If you're using lemon zest, grate it super fine and mix it in last. You want this mix smooth enough to spread but not runny.
- Build Your Layers:
- Spread the first brownie layer evenly using a flat spatula if you have one. For the cheesecake part, drop small spoonfuls all around instead of one big blob—this makes it easier to spread without messing up the chocolate underneath. Drizzle the last bit of brownie mix in a fun pattern before swirling.
- Watch The Baking:
- Look for the edges pulling away from the pan while the middle stays a bit soft. Don't bake too long or they'll turn dry. Remember, the middle keeps cooking even after you take it out.
- Cut Them Perfectly:
- Let them cool completely before cutting. For super neat squares, chill them for 30 minutes, then use a sharp knife and wipe it clean between cuts. A ruler helps if you want them all the same size.
Good chocolate makes all the difference in these treats. I once splashed out on fancy Dutch process cocoa for my daughter's birthday batch, and wow—the flavor was so much deeper. They tasted like something from an expensive bakery instead of just homemade goodies.
Keeping Them Fresh
These bites stay yummy surprisingly long if you store them right. Keep them in a sealed container at room temp for 3 days max. If you need longer, stick them in the fridge for up to a week, though they'll get a bit more fudgy—which many of my friends actually like better. Let them warm up before eating for the best taste. For freezing, put wax paper between layers in a sealed container and thaw in your fridge overnight.
Ways To Switch It Up
This basic recipe works great for trying new things. Add a bit of espresso powder to the chocolate part to make the chocolate taste stronger without adding coffee flavor. During Christmas, mix crushed candy canes into the cheesecake layer or swirl in some raspberry jam before baking. You can even make them more grown-up with a splash of orange liqueur in the cheesecake mix. My favorite twist is adding a thin caramel layer between the brownie and cheesecake parts.

Tasty Serving Ideas
These bites taste great on their own, but you can dress them up for special times. Sprinkle some cocoa powder or powdered sugar on top right before serving to make them look fancy. When making dessert platters, put them next to fresh berries and little mint leaves. At holiday parties, I serve them with coffee mixed with cinnamon and vanilla. For a super special treat, warm them slightly and top with vanilla ice cream and hot chocolate sauce.
Frequently Asked Cooking Questions
- → Can I swap semisweet chocolate chips for dark ones?
Sure thing, dark chocolate chips work great for a deeper chocolate kick. You might want to add extra sugar if they're too bitter for your taste.
- → Is it okay to leave out the lemon zest from the filling?
Absolutely, you don't need the lemon zest. It adds a bit of zing but the cookies taste wonderful without it too.
- → What's the best way to keep these cookie bites fresh?
Pop them in a sealed container in your fridge and they'll stay good for 5 days. Want them later? Freeze them and they'll last a whole month.
- → Will gluten-free flour work in this recipe?
Definitely! Just grab a 1:1 gluten-free baking flour and use it instead of regular flour for gluten-free bites.
- → How can I tell when the brownie part is done cooking?
Look for set edges with a middle that's a bit soft but not runny. Don't cook them too long if you want that fudgy goodness.
- → Can I make a bigger batch of these treats?
For sure! Just double up on all your ingredients and bake them in a bigger pan. You'll need to watch the cooking time though.