
 Save
Save
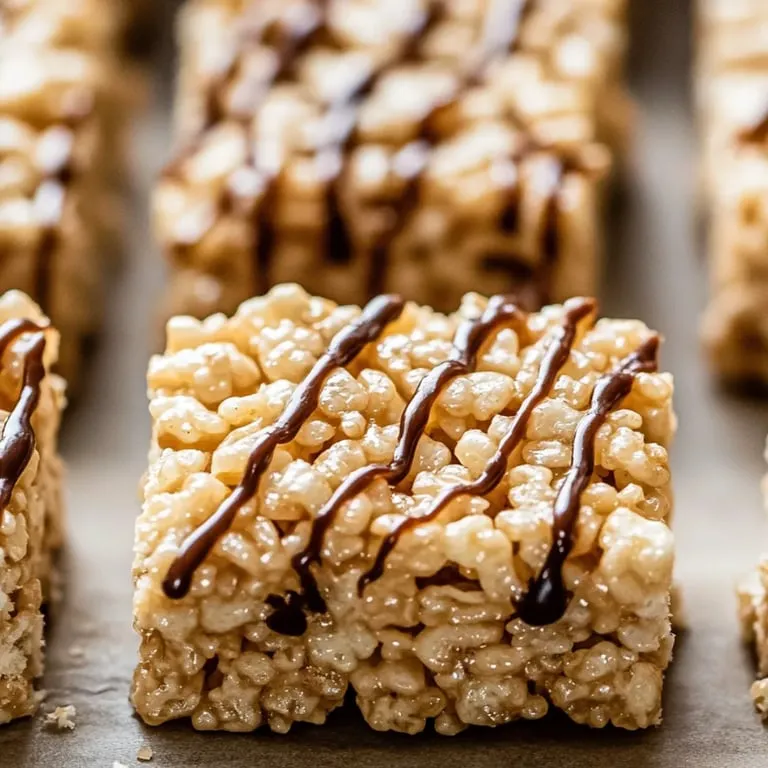
These fancy Salty-Sweet Caramel Rice Cereal Bars take your childhood favorite to another level with a mouthwatering mix of sweet and salty. Blending gooey homemade caramel, crunchy cereal, and sprinkles of sea salt creates a snack you can't put down. It's great for gatherings, homemade presents, or when you just want something special. Unlike the basic version, we're using scratch-made caramel that makes these treats vanish almost instantly.
What makes these bars stand out is good caramel - store-bought works if you're rushed, but making your own takes these treats to a whole new world. The rich flavor from slowly cooked sugar paired with the snap of cereal makes an amazing combo that'll have friends asking how you made them.
Delightful Caramel Krispie Components
- Rice Krispies cereal: 6 cups to create that essential crunch
- Homemade caramel sauce: 1 cup (whipped up from brown sugar, butter, and cream)
- Marshmallows: 10 oz mini marshmallows that melt like a dream
- Sea salt: 1 tsp chunky Maldon flakes for that fancy finish
- Vanilla extract: 1 tsp to boost those caramel notes
Making Irresistible Caramel Krispies
- Step 1: Create the Caramel
- Mix butter with brown sugar on medium heat until it turns deep amber, then carefully add heavy cream for a smooth, rich sauce.
- Step 2: Mix With Marshmallows
- Blend the hot caramel into your melted marshmallows until they're completely mixed, making a shiny, stretchy blend.
- Step 3: Throw In The Cereal
- Carefully mix in Rice Krispies so they stay crunchy while getting totally covered.
- Step 4: Cool and Cut
- Push firmly into a paper-lined dish, add salt flakes on top, and let it harden before cutting squares.
Getting That Amazing Texture
There's a trick to making these treats so darn good: first, cook your caramel to exactly 240°F (soft-ball stage) so it's chewy but not sticky. Then, add your cereal in two parts - mix in about 80% first to get everything coated well, then gently fold in the last 20% to keep some extra-crunchy bits. This creates a fun mix of chewy caramel-marshmallow base with pockets of crispiness that makes each bite interesting.
Where Caramel Krispie Bars Came From
Regular Rice Krispie treats started in the 1930s when Kellogg's wanted to sell more cereal, but the caramel version showed up in fancy bakeshops during the craft food boom of the early 2000s. This upscale twist first got hot in Brooklyn before catching on everywhere else. Adding salt to the caramel part shows how desserts were growing up with more complex flavors for adult taste buds. It's like a childhood memory that got a sophisticated makeover.
Why Salt Makes Caramel Better
There's actual science behind why we love salted caramel so much - salt particles boost how sweet things taste while cutting through richness. In these bars, salt does two jobs: it makes the caramel flavor pop and stops everything from being too sweet. Using flaky salt like Maldon gives you little bursts of saltiness that wake up your taste buds, turning a simple sweet treat into something with layers of flavor that keeps you coming back for more.
Want those picture-perfect squares? Cool the whole pan in your fridge for 15 minutes, then use a sharp knife dipped in hot water to slice. This stops sticking and gives you clean edges that look like they came from a fancy bakery.
These Salty-Sweet Caramel Rice Cereal Bars bring together the comfort food you loved as a kid with flavors that grown-ups can't resist. You can serve them at dinner parties, pack them in lunch boxes, or enjoy them with afternoon coffee. They're so satisfying yet so simple to make, you'll wonder why you ever bothered with the plain version.
Frequently Asked Cooking Questions
- → Can I use ready-made caramel instead of cooking it myself?
- You bet! Grab about a cup of thick store-bought caramel sauce to save time. Just make sure you pick a thicker sauce rather than a runny one for the best outcome.
- → What's the best way to keep these treats fresh?
- Pop them in a sealed container at room temp with some parchment paper between the layers so they don't stick together. They'll stay yummy for 3-4 days, but honestly, they're at their gooiest and best within the first couple days.
- → Is it okay to freeze these treats?
- For sure! Wrap each piece in plastic and toss them in a freezer bag. They'll keep for up to 2 months. When you want one, just let it sit out for about half an hour before diving in.
- → Why did my treats come out so hard?
- You probably cooked the marshmallows too long or pushed the mixture down too hard in the pan. Next time, just melt the marshmallows until they're barely liquid and lightly press the mix into your pan for a softer result.
- → Can I swap out the Rice Krispies for something else?
- Sure thing! While Rice Krispies give you that classic snap, you can try Cocoa Krispies, Cheerios, or even Chex for a fun twist on the basic recipe.