
 Save
Save
This make-ahead crème brûlée French toast turns basic breakfast into a memorable event without any morning hassle. I stumbled upon this method when I threw my very first holiday brunch, and it soon became what everyone expects at our family get-togethers.
I first whipped this up when looking for an easy Christmas morning breakfast solution. Seeing my family's faces light up when they tasted that sweet, crunchy topping told me we'd found our new tradition.
What You'll Need
- French bread: slightly stale bread is ideal as it soaks up the mixture without turning mushy
- Large eggs: they build the foundation and add richness to your custard
- Heavy cream: brings a velvety smoothness – try to pick one without extra ingredients
- Whole milk: teams up with cream to make the perfect custard texture
- Granulated sugar: adds just enough sweetness to the egg mixture
- Vanilla extract: brings cozy flavor notes – grab the real stuff if you can
- Ground cinnamon: adds a hint of spice that works well with the sweet caramel
- Salt: brings out all the tastes and cuts through sweetness
- Unsalted butter: starts off your caramel layer – fancy European kinds add extra flavor
- Brown sugar: gives you that trademark crème brûlée taste and texture
- Corn syrup: keeps your caramel smooth without sugar crystals forming
How To Make It
- Set Up Your Bread:
- Cut the French bread into thick 1-inch slices and pack them tightly in a buttered 9×13 baking dish. If your bread is fresh, let it sit out for a few hours first so it'll drink up more of the custard mix without falling apart.
- Mix Your Custard:
- Grab a big bowl and beat together your eggs, cream, milk, white sugar, vanilla, cinnamon, and salt until everything's well mixed. Make sure there aren't any egg streaks left. Pour this mixture all over your bread pieces, making sure each slice gets covered. Push down lightly on the bread to help it soak things up.
- Let It Rest:
- Cover your dish with plastic wrap and stick it in the fridge for at least 8 hours or leave it overnight. This waiting step can't be skipped—it lets the bread fully soak up all that custardy goodness, which gives you that pudding-like inside after baking. The longer it sits, the better it'll taste.
- Make Your Caramel:
- In the morning, heat your oven to 350°F and start on the caramel topping. Put butter, brown sugar, and corn syrup in a pot over medium heat. Keep stirring until the butter melts completely and everything mixes into a smooth, slightly thick sauce, around 3-4 minutes. Don't let it boil or it might get grainy.
- Bake It Up:
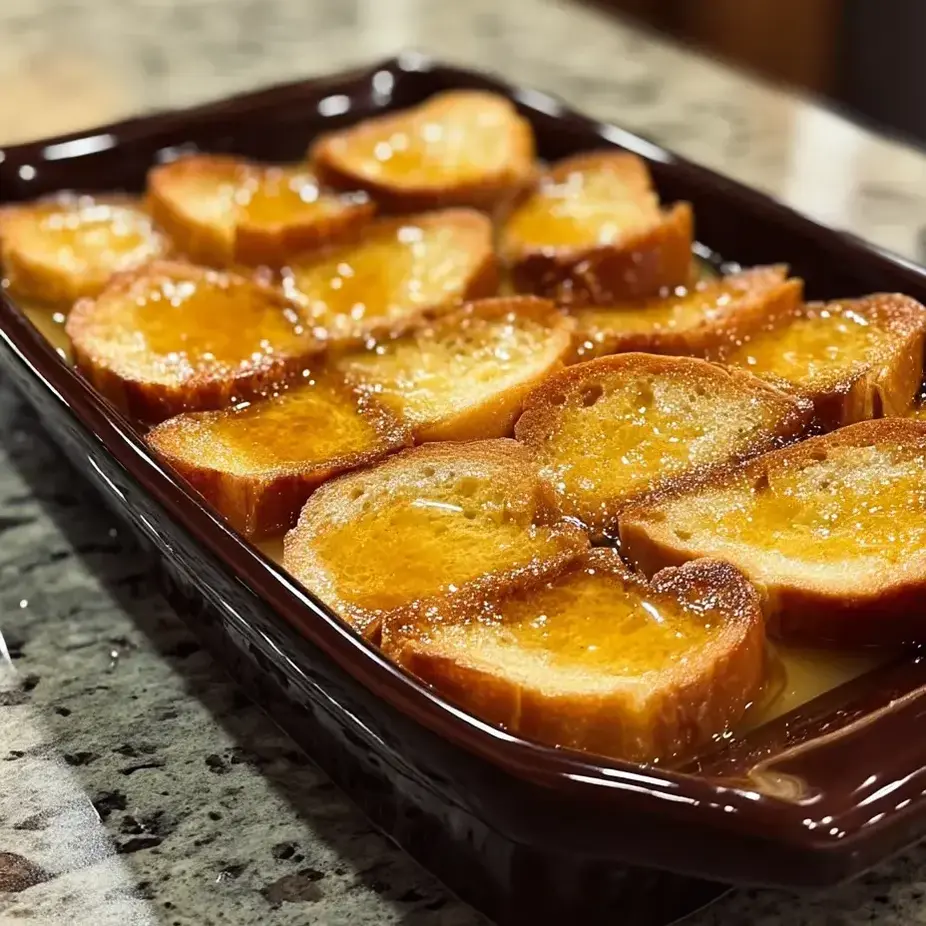
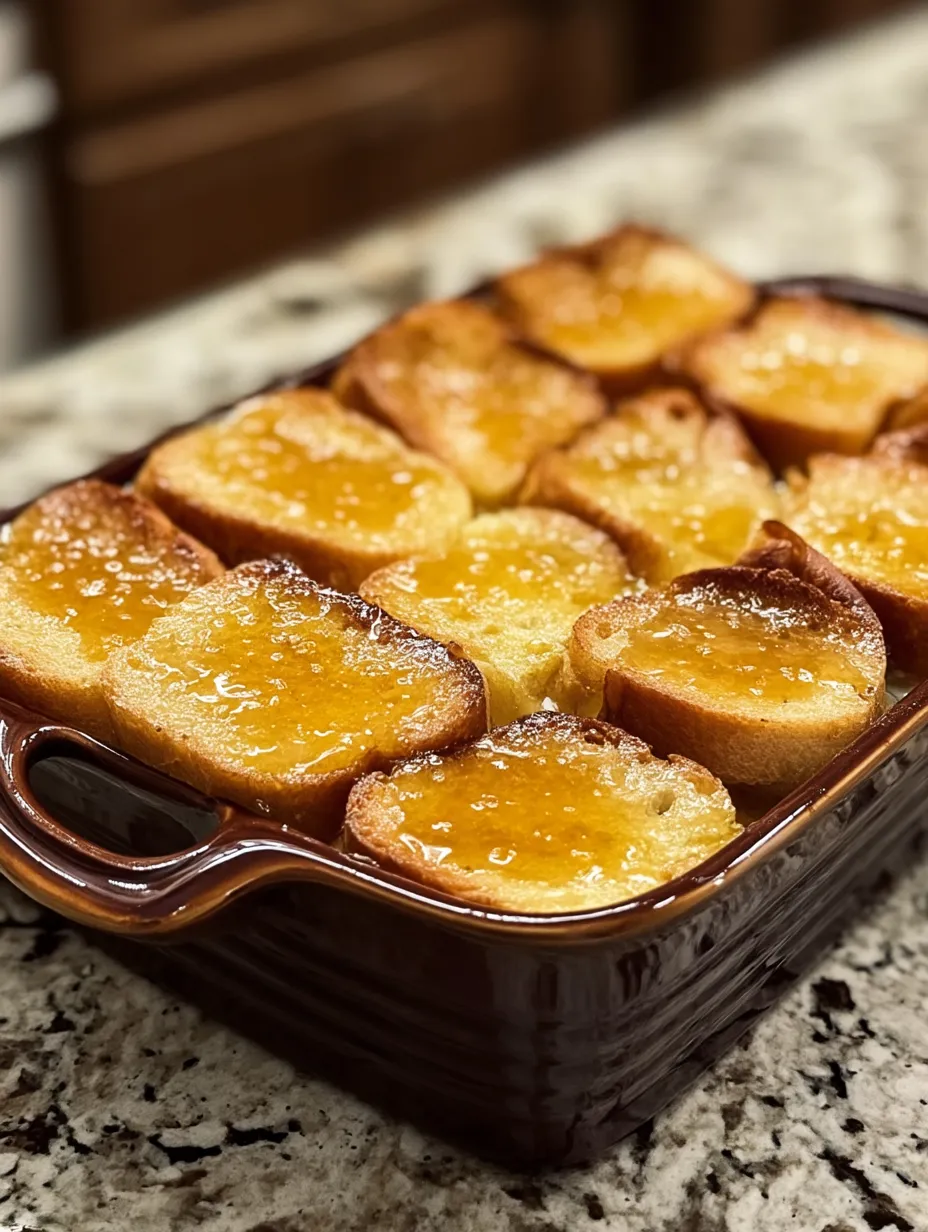
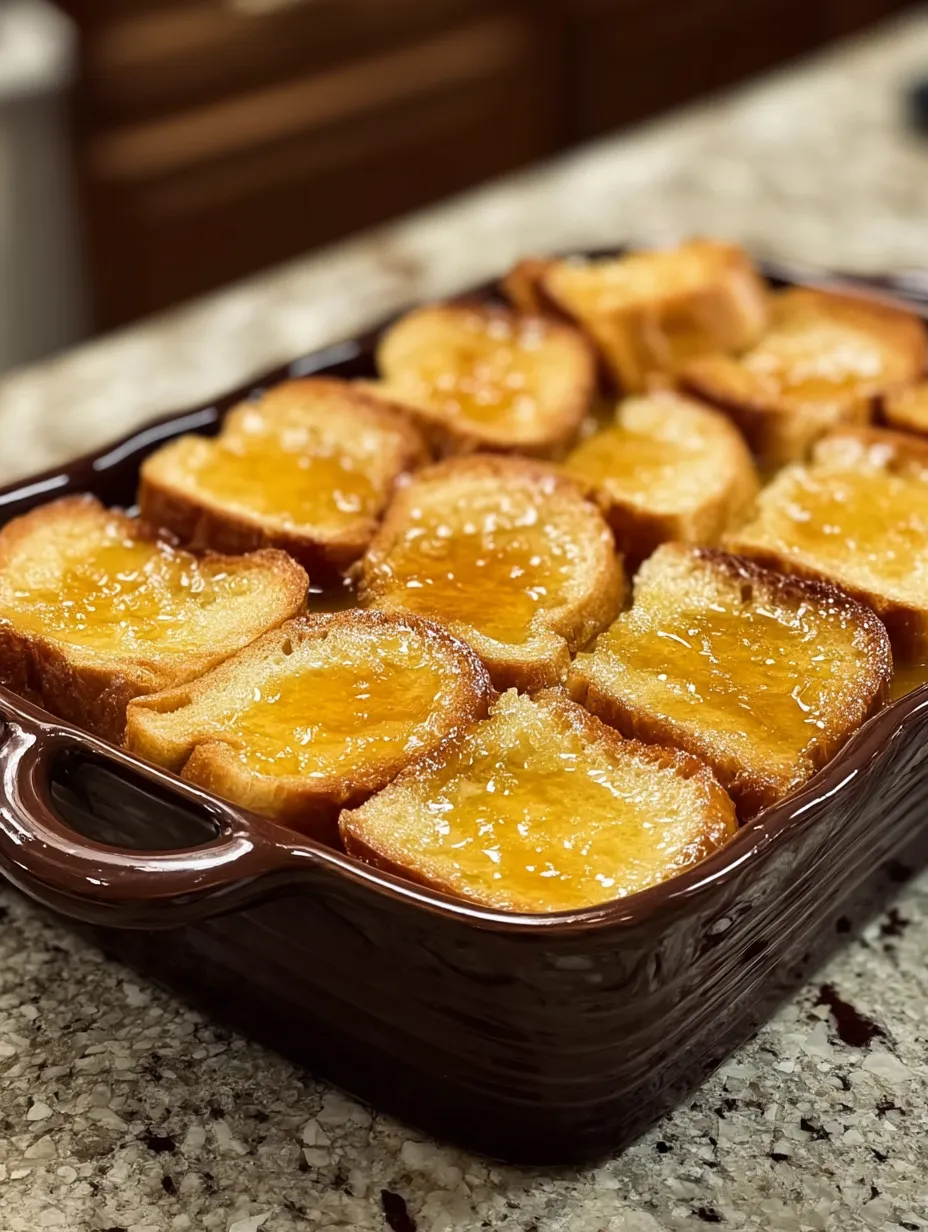
- Take your soaked bread from the fridge and uncover it. Pour your warm caramel sauce all over the top, trying to coat each piece. Put it in your hot oven and bake for 35-40 minutes. You'll know it's ready when the top turns a beautiful golden brown, caramel bubbles around the edges, and the middle puffs up quite a bit.
- Finish It Off:
- Let your French toast cool for 5-10 minutes before you serve it. This cooling time helps the caramel set a little so it doesn't just run off when you're serving. The top will be crackly like a real crème brûlée, while the inside stays soft and custardy.
Those two tablespoons of corn syrup are my little trick. Many folks try to skip it, but it's what keeps the sugar from getting grainy and helps create that perfect crackling top. My grandma showed me this trick years ago, and I've had perfect results every time since.
How To Serve It
This French toast tastes best right from the oven with a light sprinkle of powdered sugar on top. Add some fresh berries for a tangy contrast to all that sweetness. You don't really need maple syrup since the caramelized sugar makes its own amazing sauce, but I always put a small jug on the table so folks can add more if they want. I like to round out the meal with some crispy bacon or breakfast sausages to balance out the sweet flavors.
Keeping Leftovers
Any extra French toast will stay good in the fridge for about 3 days if you keep it in a sealed container. When you want to eat it again, wrap it in foil and warm it in a 325°F oven for around 15 minutes until it's hot all the way through. You can use the microwave if you're in a hurry, but the top won't stay as crunchy. I wouldn't freeze this dish if I were you—the custard tends to get a weird texture when it thaws out.
Swap These Ingredients
The original recipe gives you that real crème brûlée experience, but you can switch things up if needed. Challah or brioche work great instead of French bread and actually make it even richer. If dairy doesn't agree with you, try coconut cream instead of heavy cream and use almond milk in place of regular milk. You can use coconut sugar instead of white sugar, though your custard will look a bit darker. Maple syrup can stand in for corn syrup in the caramel, but keep a close eye on it as it browns faster.
Changing With The Seasons
You can update this basic recipe all year round by adding seasonal touches. In autumn, toss in 1/4 teaspoon of pumpkin pie spice with your custard and scatter some toasted pecans on top before serving. During summer months, try laying fresh peach slices between the bread pieces before adding the custard. For winter holidays, mix in a teaspoon of orange zest with your egg mixture and decorate with some sugared cranberries. Spring brunches taste amazing with a bit of lemon zest in the custard and fresh strawberries on top.
Frequently Asked Cooking Questions
- → How do I prevent the toast from becoming soggy?
Use thick bread slices that are a day old to soak up the egg mixture without turning mushy.
- → Can I use a different type of bread?
You can swap in brioche, challah, or sourdough instead of French bread for different tastes and textures.
- → Can I make this dairy-free?
Sure thing! Just swap out regular milk and cream with almond milk, coconut milk, or oat milk and grab some plant-based butter.
- → What toppings work best with this dish?
Try adding some fresh berries, a dusting of powdered sugar, a swirl of whipped cream, or a splash of maple syrup on top.
- → Can I freeze leftovers?
You can freeze any extra portions in sealed containers after they've cooled. Just warm them up in your oven or microwave when you're ready to eat.